
OTTOLENGHI'S RUTABAGA GNOCCHI WITH MISO BUTTER
RUTABAGA GNOCCHI IN MISO BUTTER
OUR TWIST ON A RECIPE FROM CHEF OTTOLENGHI’S 2020 BOOK, FLAVOUR

Despite how complicated this recipe looked, we found it quite easy in the end. The photos below are from our first attempt, so you can absolutely do it too. We didn’t find morning glory, which Flavour calls for, so we replaced it with arugula and julienned leeks. We also always use Flourist flour because it isn’t bleached, heated, refined, or deconstructed. (Read more about them here.) The hardest part in this recipe was cutting the gnocchi into the boiling hot water — so just be careful while doing that and you’re golden.
YOU’LL NEED:
1-2 medium sized potatoes
1 large rutabaga
5 tbsp extra virgin olive oil
1 free-range egg
1 tbsp rock salt
1 cup + 3 tbsp Flourist flour
2 cups chicken stock
7 ounces (handful) or arugula
1 leek
1 tbsp miso paste
1 small lime
1/4 ounce (one chunk) ginger, peeled and finely grated
1/4 cup grass-fed, free range, local unsalted butter
1 tsp black sesame seeds (or white if desired)
ODD TOOLS:
Piping bag with large round attachment (or a plastic bag with corner cut off)
Citrus juicer (optional to squeeze by hand)

These are the ingredients we use, but source your own favourites!
How to make it!
Feel free to refer to the photos below. They don’t include every detail like the below steps do, but should help you envision what is happening in each step.
STEPS:
1. Preheat oven to 450°F/220°C.
2. Wrap the potatoes with aluminum foil; bake for 1 hour.
3. Meanwhile, peel and cube the rutabaga. Place them in a baking sheet and toss with olive oil. Cover with foil and bake for 30 min.
4. When potatoes are cooked and cooled, peel them and mash until smooth (no lumps).
5. When rutabagas are cooked, blitz in a food processor (or with hand blender) until smooth. (Add more olive oil while blitzing if needed.)
6. Place rutabaga mash, potato mash, the yolk of the egg (place egg white aside), dash of salt and mix. When well combined, fold in the flour cup by cup. Mix with a spatula or paddled wooden spoon until smooth.
7. Spoon dough into a piping bag with a large, circular mouth attachment (or a plastic bag with a corner snipped off) and cool in fridge for about 1 hour.
8. Remove dough. Fill pot half-way with water and a pinch of salt. Bring to a boil. Decrease heat until simmering gently. As you squeeze dough out of bag into the water, use a sharp knife to cut it off at 1 inch pieces. (photo below). *Be careful to remain close to the water so it doesn’t splash too much and burn your hands!
9. Continue cutting dough pieces into pot until the begin to float (about 2-3 min) and are not crowded as they float. When too many pieces are floating, place dough to repeat process for next batch.
10. Lift pieces out with slotted spoon and place on a greased baking sheet or cooling rack covered with parchment paper. Once all the gnocchi are all cooked, drizzle with olive oil and place in fridge for 20 min.
11. While waiting, julienne leeks and wash arugula. Pour stock into large saucepan and cook on medium-high heat for 12-14 min (slightly reducing volume of liquid). Add the leeks and cook for 3-5 min. Remove leeks with slotted spoon and set aside. Repeat with arugula but for under 1 min. Set aside.
12. Reduce liquid to medium-low heat. Spoon out about 1/2 cup of broth into a separate small bowl and add 1 tbsp of miso paste into bowl. Whisk and pour the new paste back into saucepan.
13. Skin and grate (if already haven’t) the ginger knob and stir it into saucepan along with the 1/4 cup of butter. Squeeze the juice from 1/2 of your lime into saucepan liquids; stir. Do not let liquid boil but cook until smooth and slightly thickened.
14. On separate burner, heat olive oil in a cast iron pan on medium-high heat for under 1 min. Remove gnocchi from fridge and place in pan. Fry 1-2 min (or until lightly browned) on each side.
15. Add gnocchi and greens into the large saucepan with the sauce and heat lightly until evenly warm (about 2-3 min).
16. Serve our gnocchi, greens, and sauce onto plates and sprinkle sesame seeds on top. (Flavour calls for chopped green onions, which we didn’t do, but feel free to add those too!)

Peel and dice rutabaga; cover potatoes with aluminum foil

Let potatoes cool, then peel them

Mash potatoes until smooth with no lumps
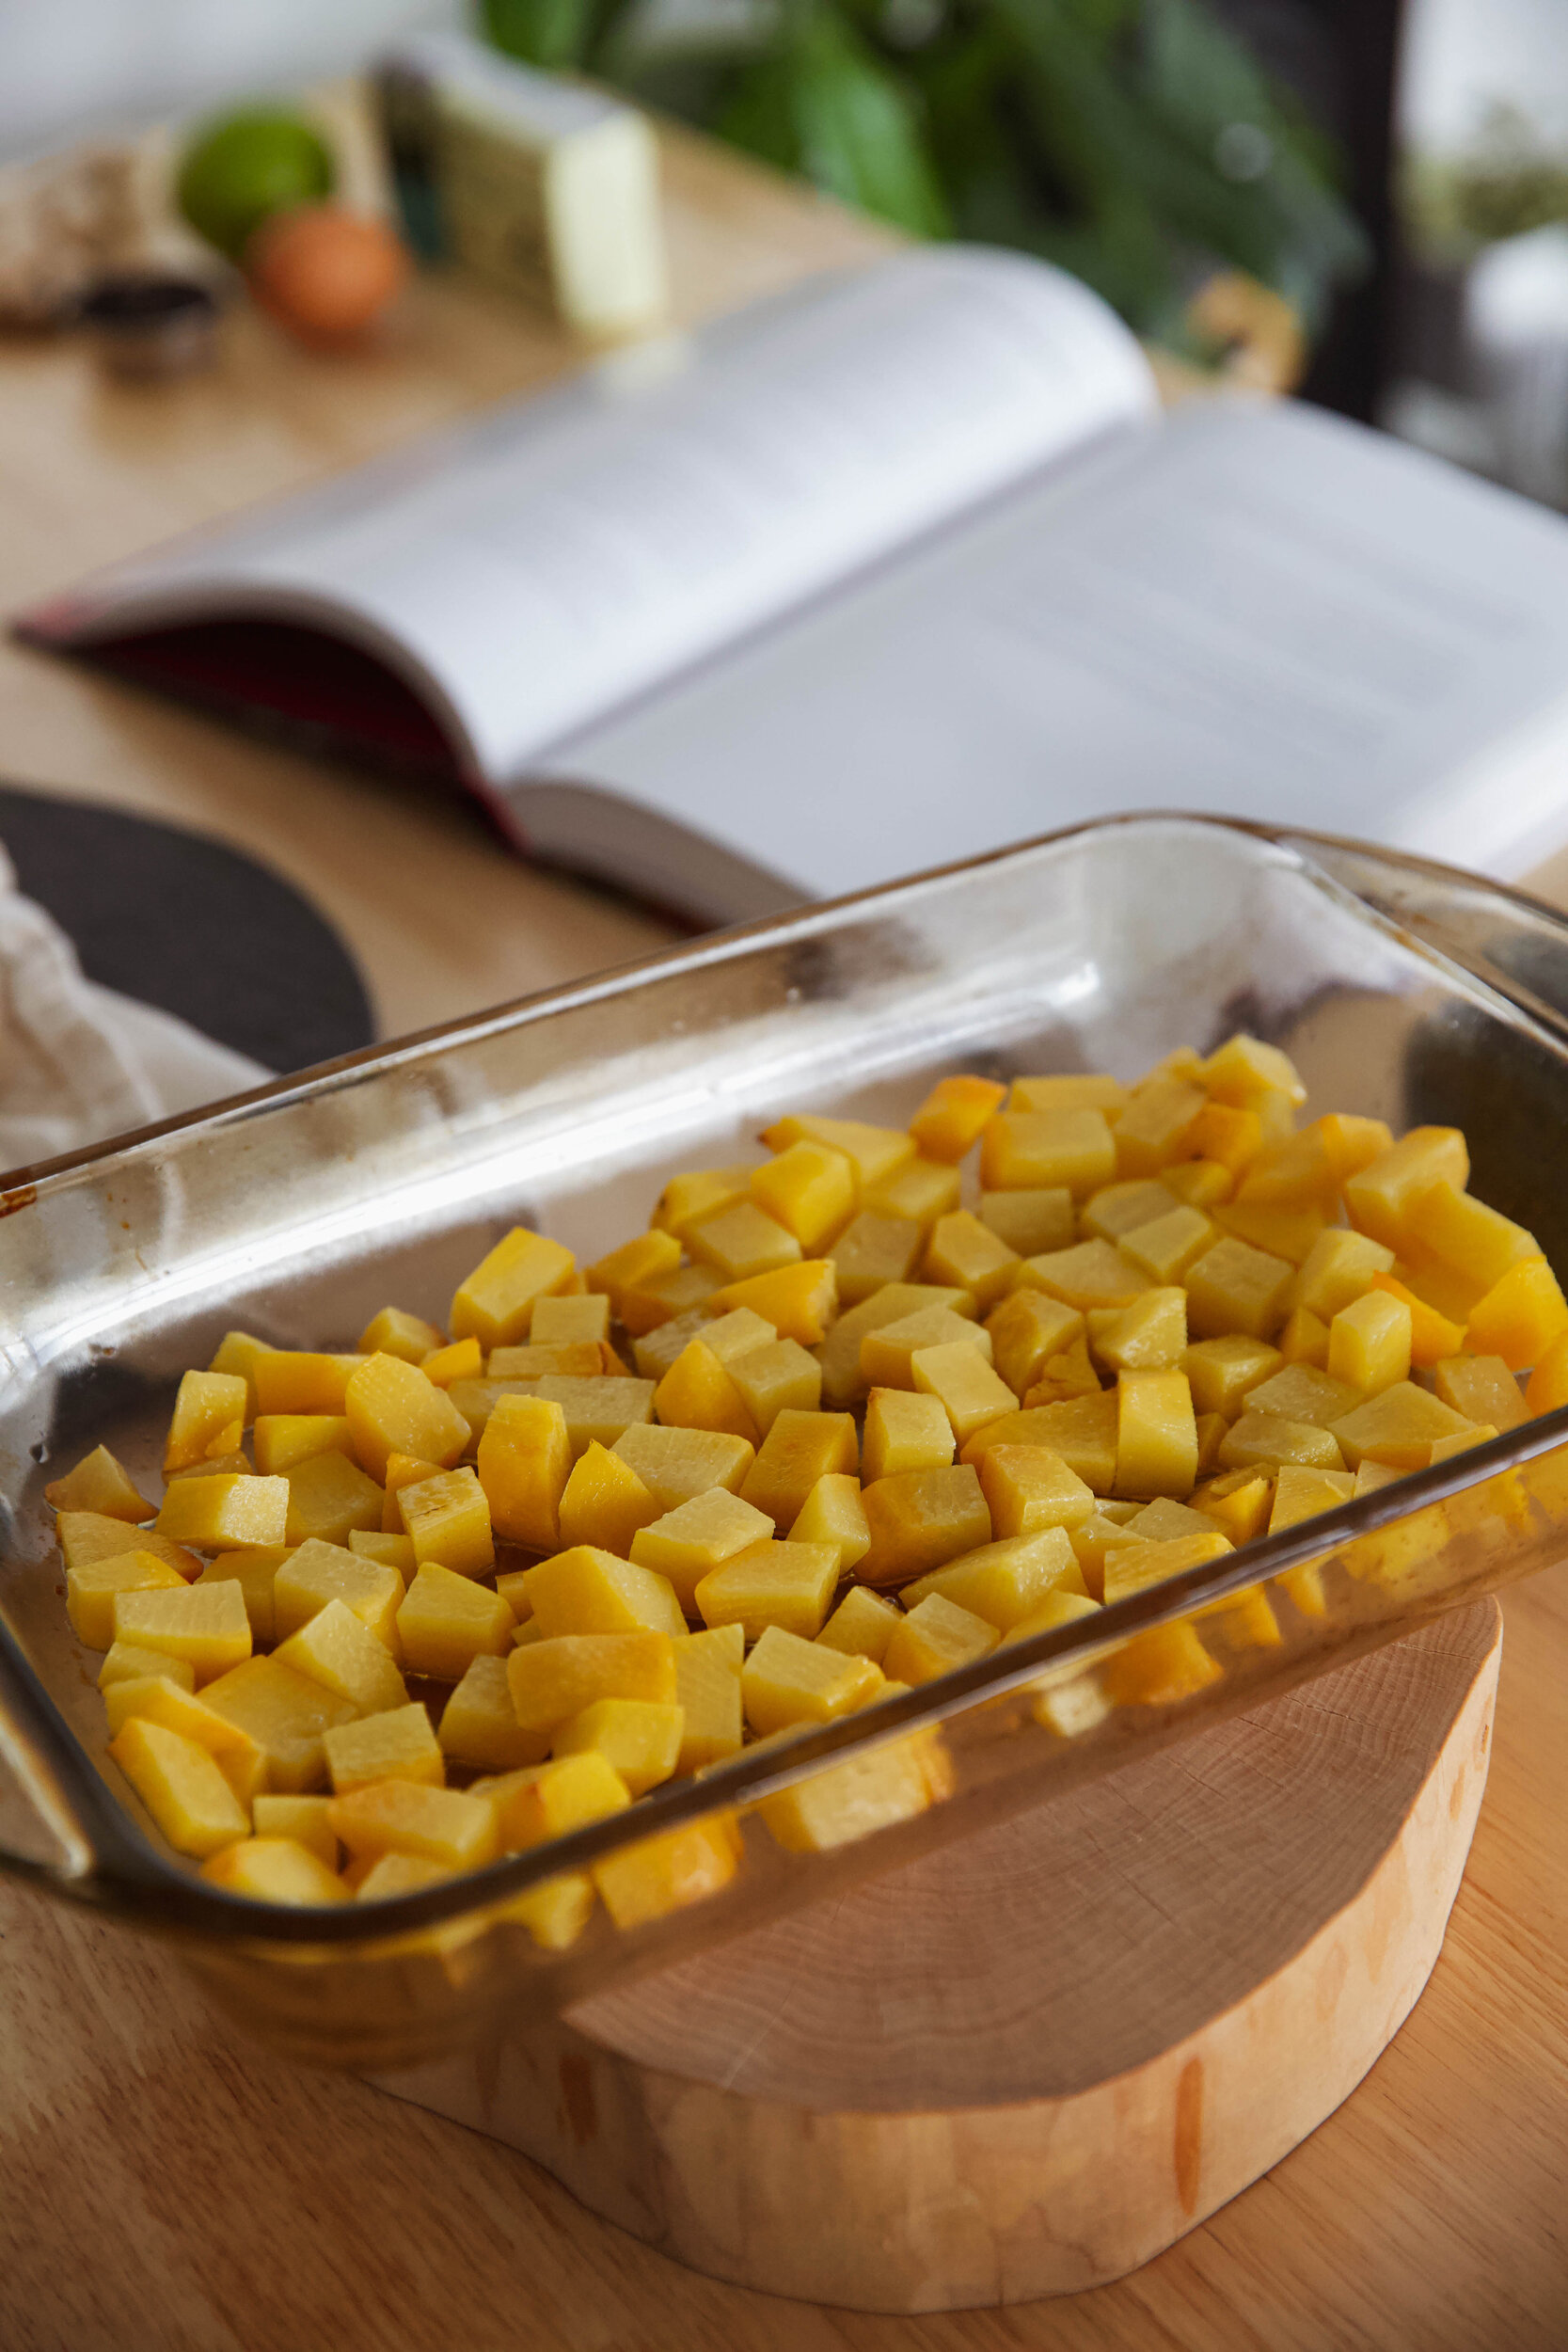
Drizzle rutabaga in olive oil; cook for 30 min

Blend cooked rutabaga with hand blender until smooth

Add yolk of your egg to mashed rutabaga + mashed potatoes + pinch of salt; mix well
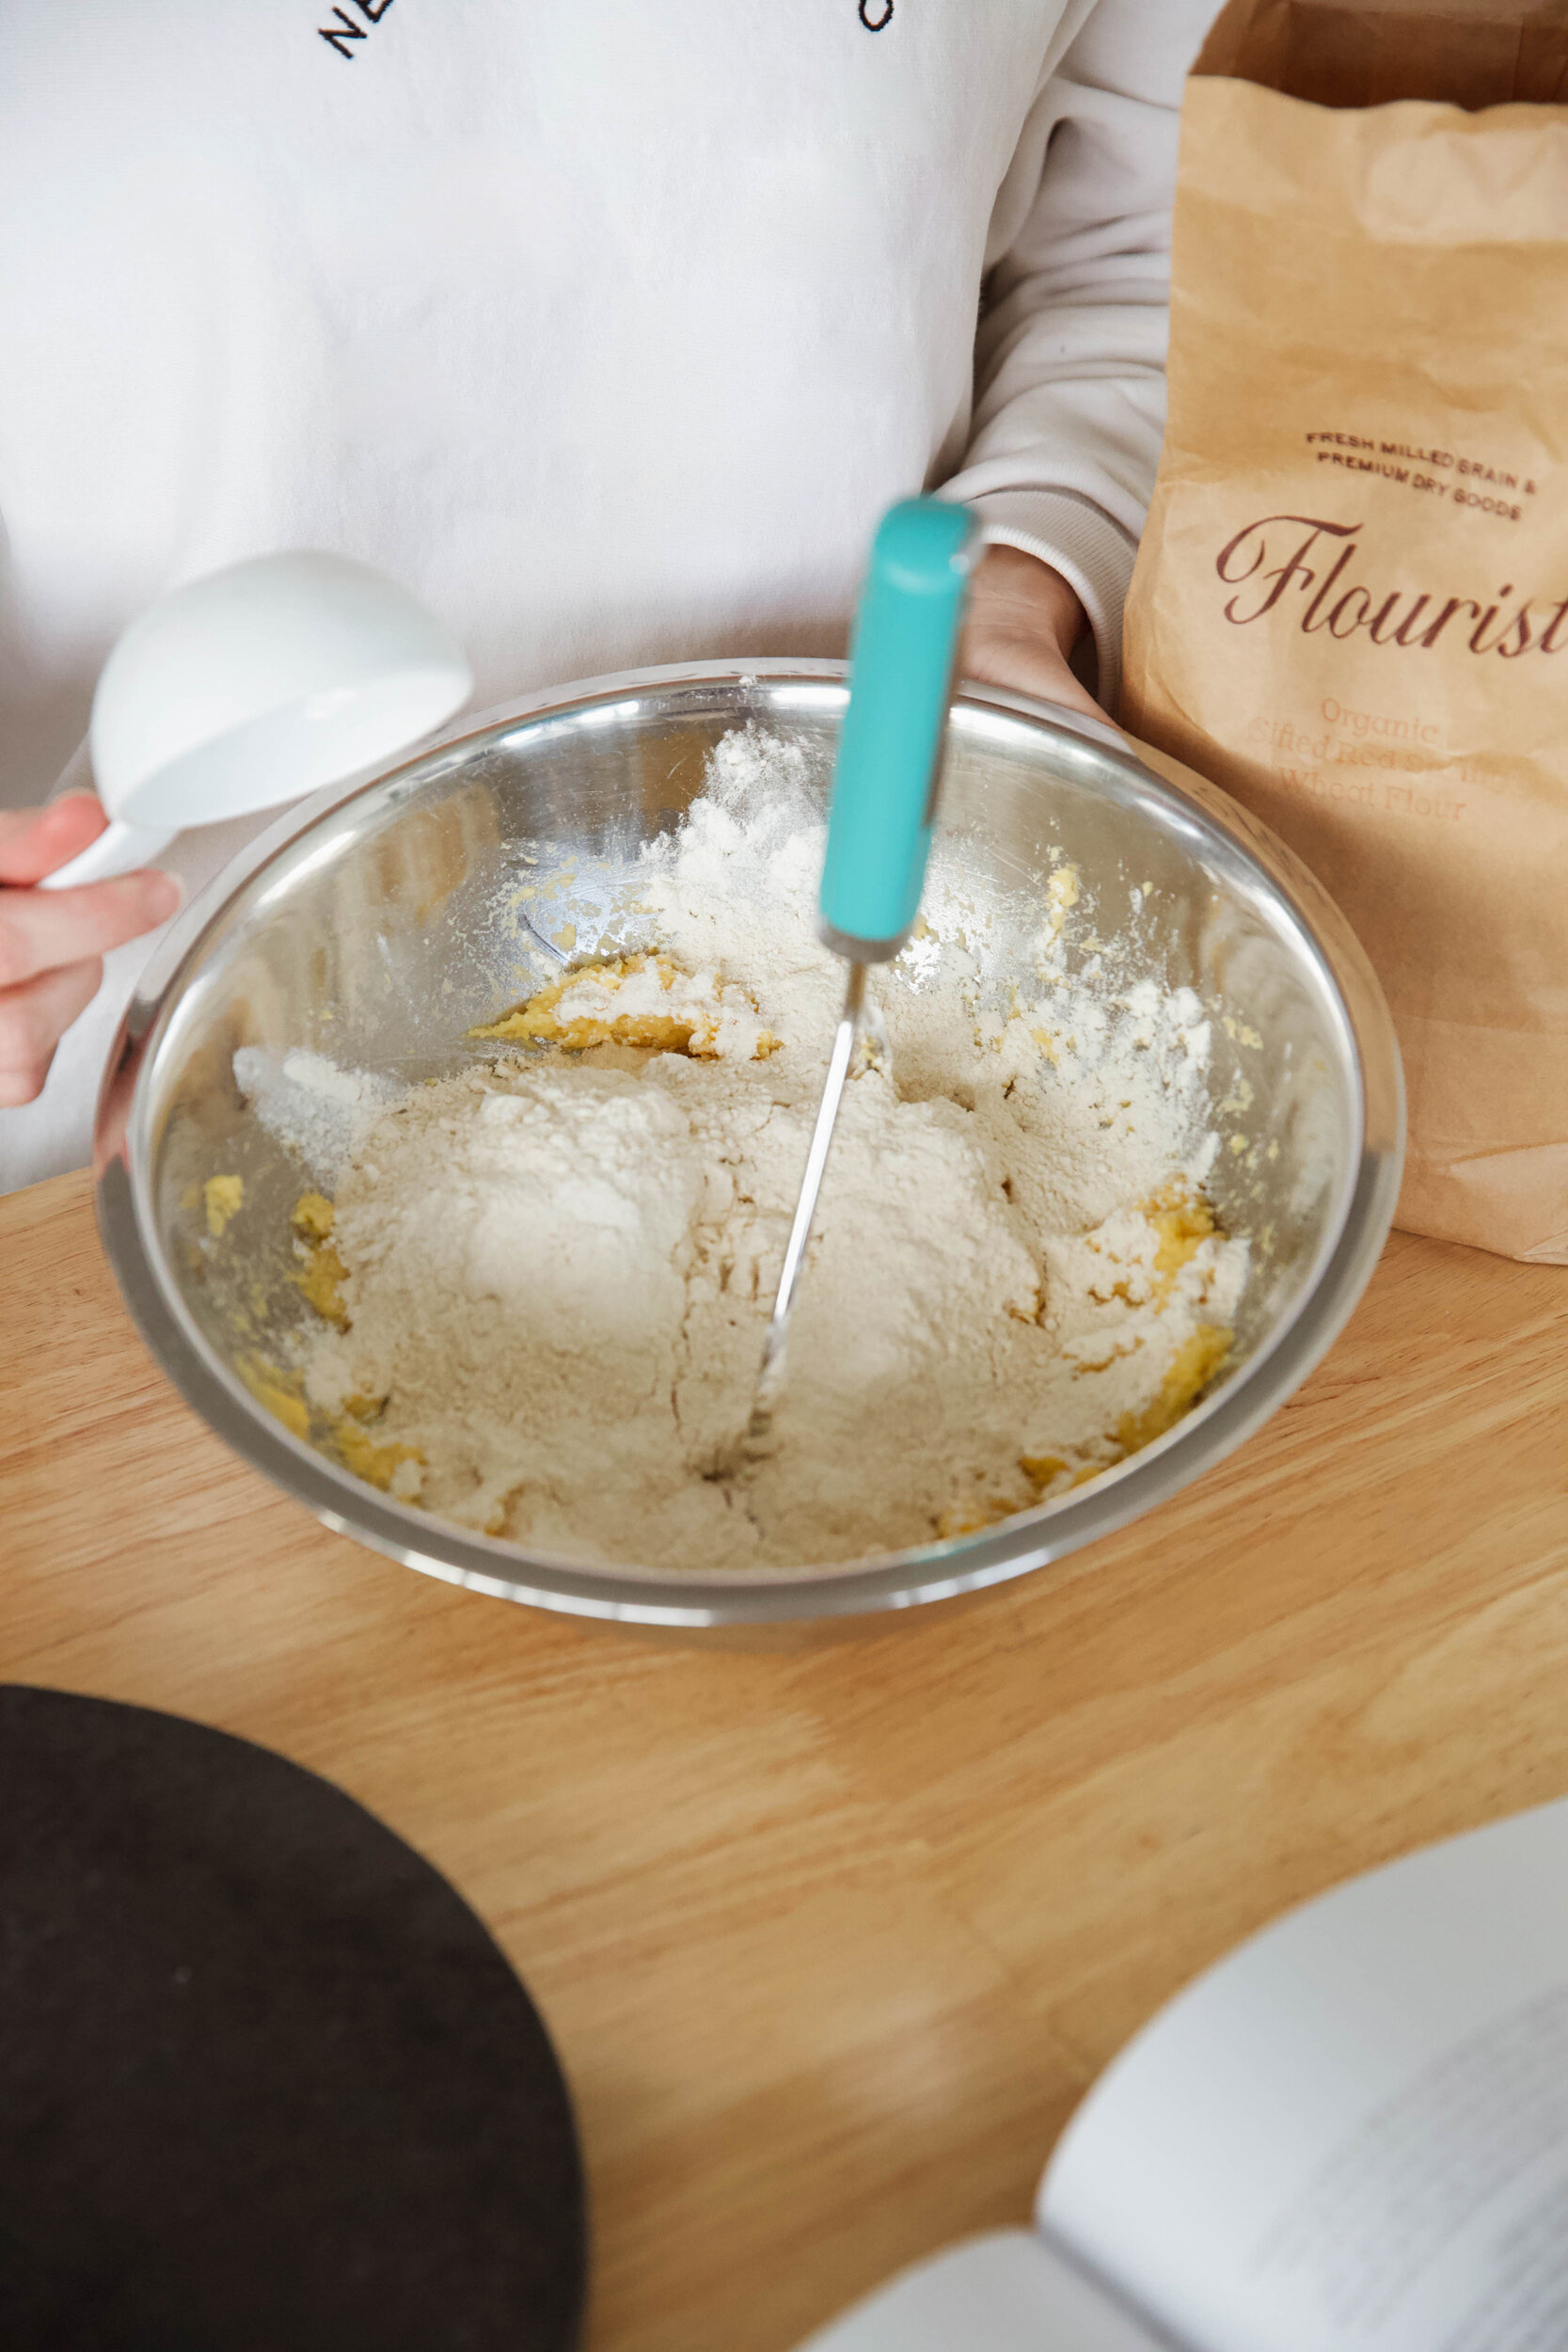
Add flour cup by cup while folding with a spatula

continue to fold flour into mixture with spatula until evenly mixed

Spoon dough into piping bag and refrigerate for an hour

Boil water & salt, cut off dough at 1 inch each, let boil in pot for 2-3 min or until floating

Place boiled/cooked gnocchi onto greased pan or cooling rack lined with parchment

drizzle with olive oil and put in fridge again for about an hour (this keeps them fluffy)

Boil 2 cups of chicken broth on medium-high until volume slightly reduced

Cook julienned leeks for about 3-5 minutes

Cook arugula for under 1 min (slightly wilted), Spoon out with slotted spoon; set aside.

Peel and finely grate small knob of ginger

Prepare 1 tbsp miso paste, then squeeze half your lime

Whisk miso, 1/4 cup butter, lime juice, and ginger into saucepan of reduced broth

Remove gnocchi from fridge and heat oil in cast iron; when hot, cook gnocchi in pan

Once browned, flip gnocchi and cook other side until browned

Throw gnocchi & wilted greens into saucepan with miso butter mixture; stir, heating slightly

Divide onto dinner plates and sprinkle with sesame seeds — now eat!

Pro tip!
With your leftover egg white and other half of lime, make a Pisco sour to drink alongside your dinner!
Questions? Put them in the comments below! And thank you for cooking with us!